
Abstract
One of the most prominent additions to vRealize Automation 7.0, aside from the converged blueprints, is a feature called the Event Broker. This service provides a uniform and robust way of subscribing to and responding to various events originating from vRA. It allows you to plug in actions and checks throughout a machine life cycle, but it goes further than that. With the Event Broker, you can subscribe to other events as well, such as blueprint lifecycle events, approval events and system log events.
This article aims to explore the Event Broker and to show a few examples of how it may be used.
Event Broker architecture
The design of Event Broker is, in essence, a classic publish/subscribe architecture. In other words, the service acts as an event distribution point where producers of events can publish them and consumers can subscribe to specific event streams. Clients would typically subscribe to a category of events, typically known as a “topic”. Events are often filtered even further using conditions, e.g. subscribing to events only from a certain part of the life cycle or only for a certain type of objects. Unlike a traditional publish/subscribe architecture, subscribers of the Event Service can also control the underlying workflow using “blocking events”, which we will discuss in more depth in upcoming articles.
Under the hood, the Event Broker is implemented using a persistent message queue, but most users are probably going to interact with it using vRealize Orchestrator (vRO). When an event that matches the topic and condition for a subscription is triggered, a corresponding vRO workflow is started.
Each topic has a schema that describes the structure of the data carried by the event. For example, a machine provisioning event carries data about the request, such as the name of the user making the request, the type of machine, amount of CPU and RAM, etc.
It’s important to remember that event subscriptions will trigger on any object that’s applicable to the topic. In vRA 6.x, you would typically tie a subscription to a specific blueprint, but with the Event Broker, you would get any event for any machine from any blueprint. In order to restrict that to specific blueprints or machine types, you will have to use a conditional subscription. While there is a slight learning curve involved, the end result is a much more flexible and efficient event mechanism.
Taking the Event Broker for a spin
Enough of theory and architecture for now. Let’s take it for a spin and see if we can get it to work!
A Hello World example
First, let’s just see if we can get the Event Broker to trigger a workflow on any event during a VM provisioning. Let’s create a simple vRO workflow that looks like this:

Our workflow takes no parameters and just prints a string to the vRO system log. Let’s save it and go back to vRA. In vRA, we go to Administration->Events-Subscriptions and click the “New” button (the plus). This is what we’ll see:
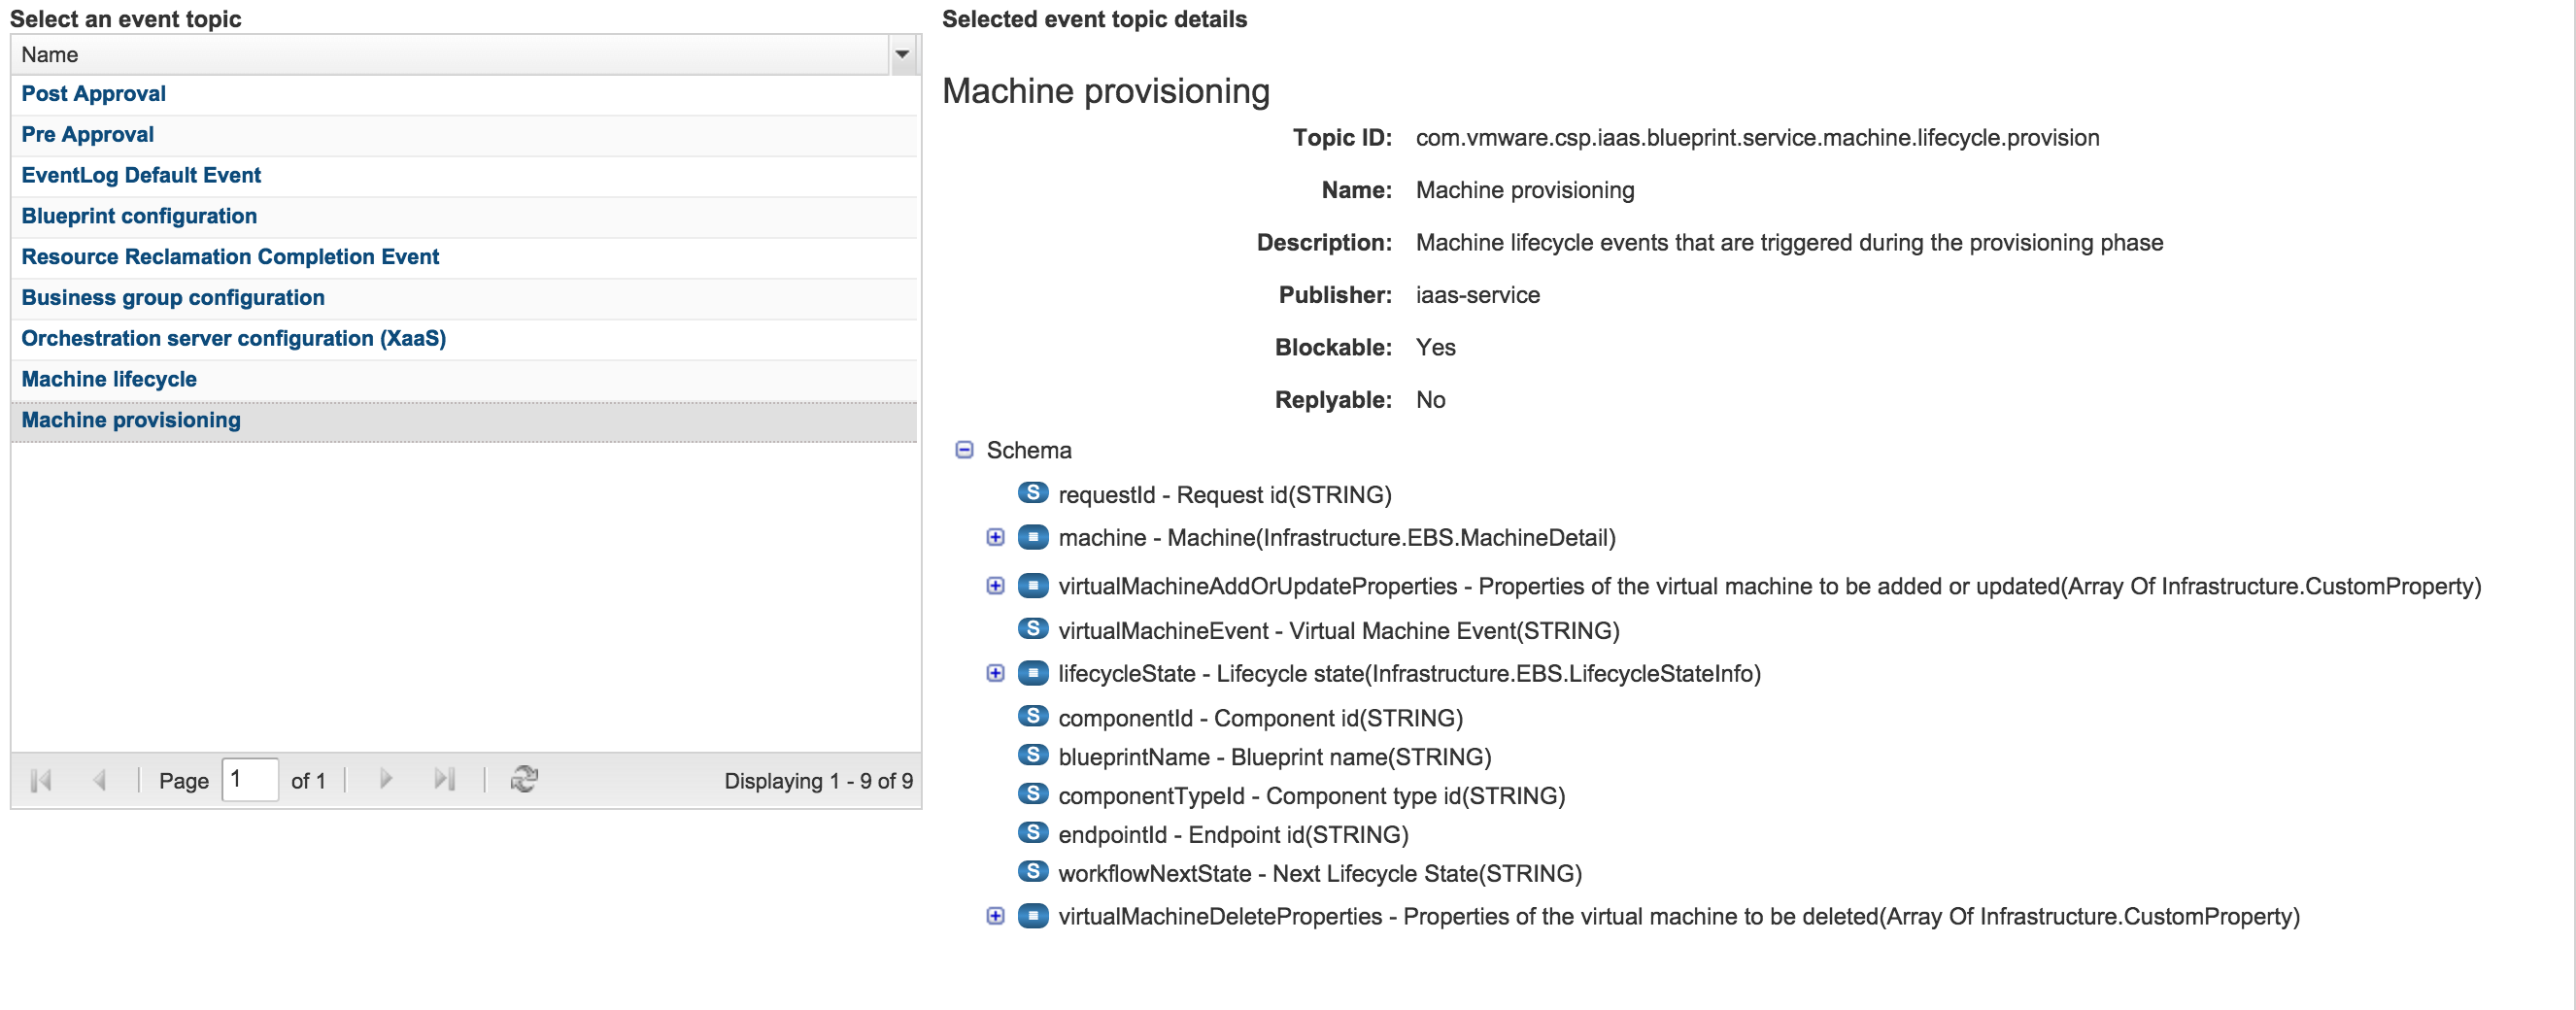
As we discussed earlier, an event topic is just a category of events you can subscribe to. Since we were going to trigger our vRO workflow on provisioning events, we select “Machine provisioning” from the list of topics. Once we select the topic, we’ll see the schema for it, i.e. a description of the data carried by the event. As you can see from the screen shot, we now have access to all the data about the request and the machine being requested. Let’s click the Next-button and go to the next screen!

Here we can choose between subscribing to all events or to do it based on a condition. A machine provisioning triggers multiple events: When the machine is built, software is provisioned, turned on and so on. Normally we’d add some conditions to pick exactly the events we want, but in this case, let’s just go with everything. Let’s go to the next screen!

This dialog let’s us pick the vRO workflow to run. We’re going to pick the “Hello World” workflow we just created. Let’s just click “Next” and “Finish” from here and we’ll have a subscription called “Hello World”, since it gets the workflow name by default.

The last thing we need to do is to select the subscription and click publish. Like most objects in vRA, they are initially saved in a draft state and need to be activated before they kick in. Now we’re ready to test out workflow! Let’s go request a machine and wait for it to complete! Once the provisioning has completed, we can go to vRO to check on our workflow. It should now have a bunch of tokens (executions) and look something like this:
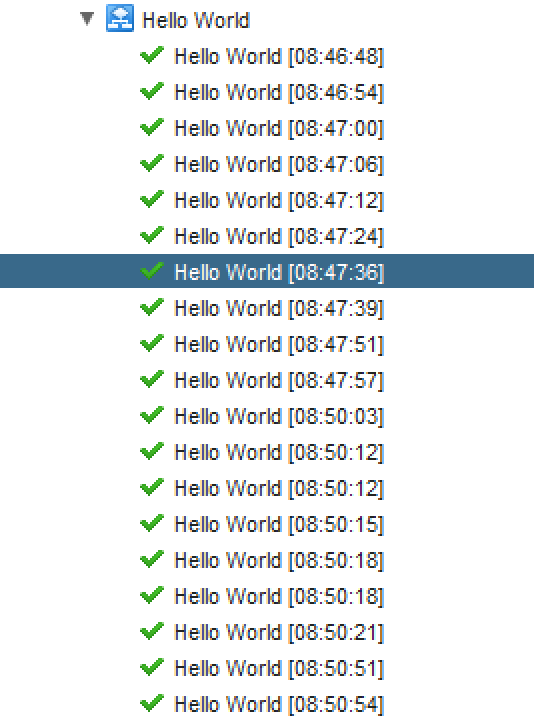
Why so many executions? Remember that the provisioning process generates an event per state it goes through, so you’ll see a lot of events, since there’s a lot of states to go through. And in fact, there’s two events generated per state, one just before it goes into the state and one just after it leaves it. We call these pre-events and post-events.
Congratulations! We’ve created our first event subscription!
Where are the parameters?
So far, our event subscription is pretty useless, since all it can do is to print a static string to the log. We don’t know anything about what kind of event we received or which object it was triggered for. To build something more interesting than just a “Hello World”, we’ll need access to the event parameters. But where are they?
Let’s click on one of the workflow tokens in vRO and select the variables tab!
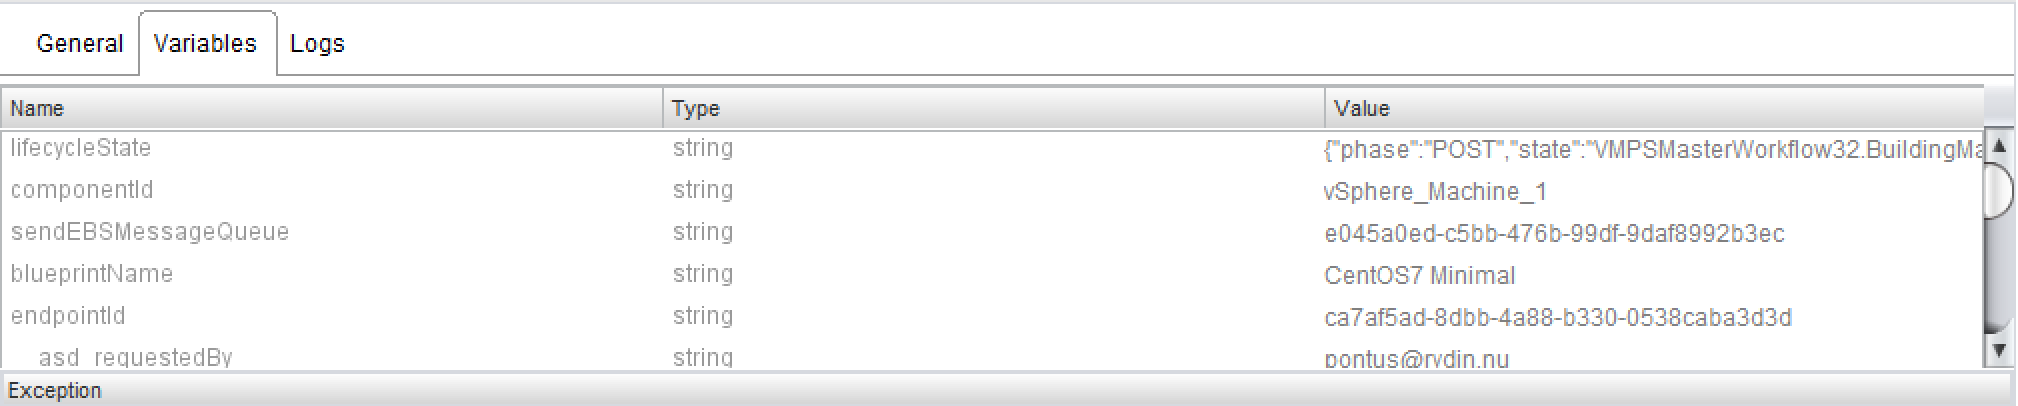
Looks interesting! So it appears that all the variables from the event schema were actually sent to the vRO workflow. But how can we access them? That turns out to be very simple! Just create an input parameter to your vRO workflow with the same name and type as the event variable.
Let’s add the input parameters “lifecycleState” and “machine” to our workflow! This should give us information on what state we’re in and the machine that triggered the event. Let’s also change the code of our scriptable task a bit to look like this:

Each time we get an event, we’re going to print information on what lifecycle state we’re in and what machine we’re provisioning. Provisioning a machine should get you a log record that looks something like this:

The state information deserves a closer look. It’s made up of two variables: A phase and a state. The state simply corresponds to the machine states you may be familiar with from IaaS. “VMPSMasterWorkflow32.BuildingMachine” means that the machine is in the initial building stage. The “phase” variable says “PRE” in this example, which means that we caught this event just before the initial build happened. Had it said “POST”, we would have gotten it right after the initial build was done.
And, by the way, those lifecycleState and machine variables are encoded as JSON strings. If you want to manipulate them as associative arrays/dictionaries instead, just call e.g. JSON.parse(lifecycleState). We’ll be doing that in some of the more advanced examples.
Adding a condition
At this point, we have a semi-interesting example of an event subscription. But it’s triggering on every single event for every single VM being provisioned. In a real life scenario, this wouldn’t be very nice to your vRO instance. So let’s dial things down a bit by introducing a condition to our subscription.
To do this, we need to go back to Adminitration->Events->Subscriptions and click on our “Hello World” subscription to edit it. Then we go to the “Conditions” tab and select “Run based on conditions”.

The condition can be any test on any field, or a combination of several fields. In our case, we’re just going to select the lifecycle state name.

Let’s do a simple “equals” operation and test against a static value. The drop-down allows us to select from a list of predefined value. In this case, we want to trigger only if we’re in the “BuildingMachine” state.
We’re now saving the subscription by clicking “Finish” and testing it by provisioning another VM. This time, we should only see two executions of our vRO workflow: The PRE and POST events for “BuildingMachine”.
Conclusion
This is the first installment in a series of articles on the Event Broker in vRA 7.0 and is intended to get you familiarized with the new functionality. While the examples given aren’t useful for real-life scenarios, they might serve as templates for more realistic workflows.
In the next installment (coming soon) of this series we are going to look at more useful examples, such as an auditing workflow imposing hard limits on resource usage. If that sounds interesting, I recommend you add this blog to the list of blogs you follow!

Really good stuff. Looking forward for part2!
LikeLike
Thanks! Coming up shortly…
LikeLike
Very informative. Thanks
LikeLike